
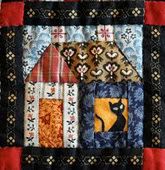
This closeup shows some of the quilting. I primarily quilted in the ditch around the kitties, but having not read the instructions for the batting in advance, discovered, after it was pinned, that I needed to quilt within 3 inches. Thus, I needed something in the spots where kitties were facing away from each other. I used designs from one of my recent quilting book purchases as well as making up things such as a Friskies cat food can and milk container. The little mouse in the corner is a freebee mouse design from Quiltmaker.

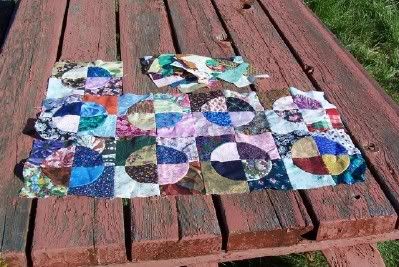
The back of the quilt was done with 3 fabrics sewn together. I figured that it was a patchwork on the front, may as well do it on the back as well (and use up some stash).

This pattern is from McCalls October 2000 by Robert Callahan based on a design by Janet Kime. I used the modified kitty block featured at the link below, which gives a little more space for the kitty kat ears.
(edited) The link to the pattern adaptation used for this quilt is no longer active. Therefore, I am placing piecing instructions here. Sorry, don't have the diagrams.
Finished size: 5"x9" (unfinished size: 5-1/2" x 9-1/2")
Please use good quality fabric. Wash and iron before using.
Cat fabric: cut (2) 1-1/2" x 1-1/2" squares, (1) 3-1/2" x 8-1/4" rectangle, (1) 2-1/2" x 6-1/2" rectangle.
Background fabric: cut (1) 1-3/4" x 3-1/2" rectangle, (1) 2-1/2" x 5-1/2" rectangle.
Piecing the Block:
1. Draw or press/iron a diagonal line on wrong side of cat fabric 1-1/2" square. Place cat fabric square on background 1-3/4" x 3-1/2" rectangle, right sides together, aligning bottom raw edges. You'll notice that there will be extra background material above the square. This is to ensure that the tops of the ears don't get lopped off! Stitch on the drawn/pressed line. Trim excess fabric; press open. Repeat on opposite end of background rectangle with matching 1-1/2" cat fabric square to make a pieced rectangle.
2. Sew pieced rectangle to matching cat fabric 3-1/2" x 8-1/4" rectangle.
3. Draw a 45° diagonal line on wrong side of background fabric 2-1/2" x 5-1/2" rectangle from upper left hand corner to raw edge. Hint: to quickly and accurately mark diagonal, simply fold upper right hand corner down to left edge to form triangle. Align raw edges and finger-press along fold.
4. Sew pieced rectangle to matching pieced cat body. And there you have it! A cute little kitty!


No comments:
Post a Comment